The most straightforward way to offer configurable products with WooCommerce is to use the Variable product type to create product variations.
From an inventory perspective, a variable product is a practical way to simplify the management of many related SKUs that share the same configurable attributes. However, only a single SKU is used when a variable product is purchased — the SKU associated with the chosen variation.
In contrast, a composite product consists of several other products that need to be assembled or bundled together. Multiple SKUs are affected when a composite product is configured and purchased.
If you are creating a configurable product and can’t decide between using the variable or the composite type, determine whether the offered options must be inventory managed individually. If yes, then choose the composite type and:
- Create Components to describe the parts or attributes of the configurable product.
- Create a new product for each option you want to offer and, if necessary, use Catalog Visibility to prevent it from appearing in your shop pages.
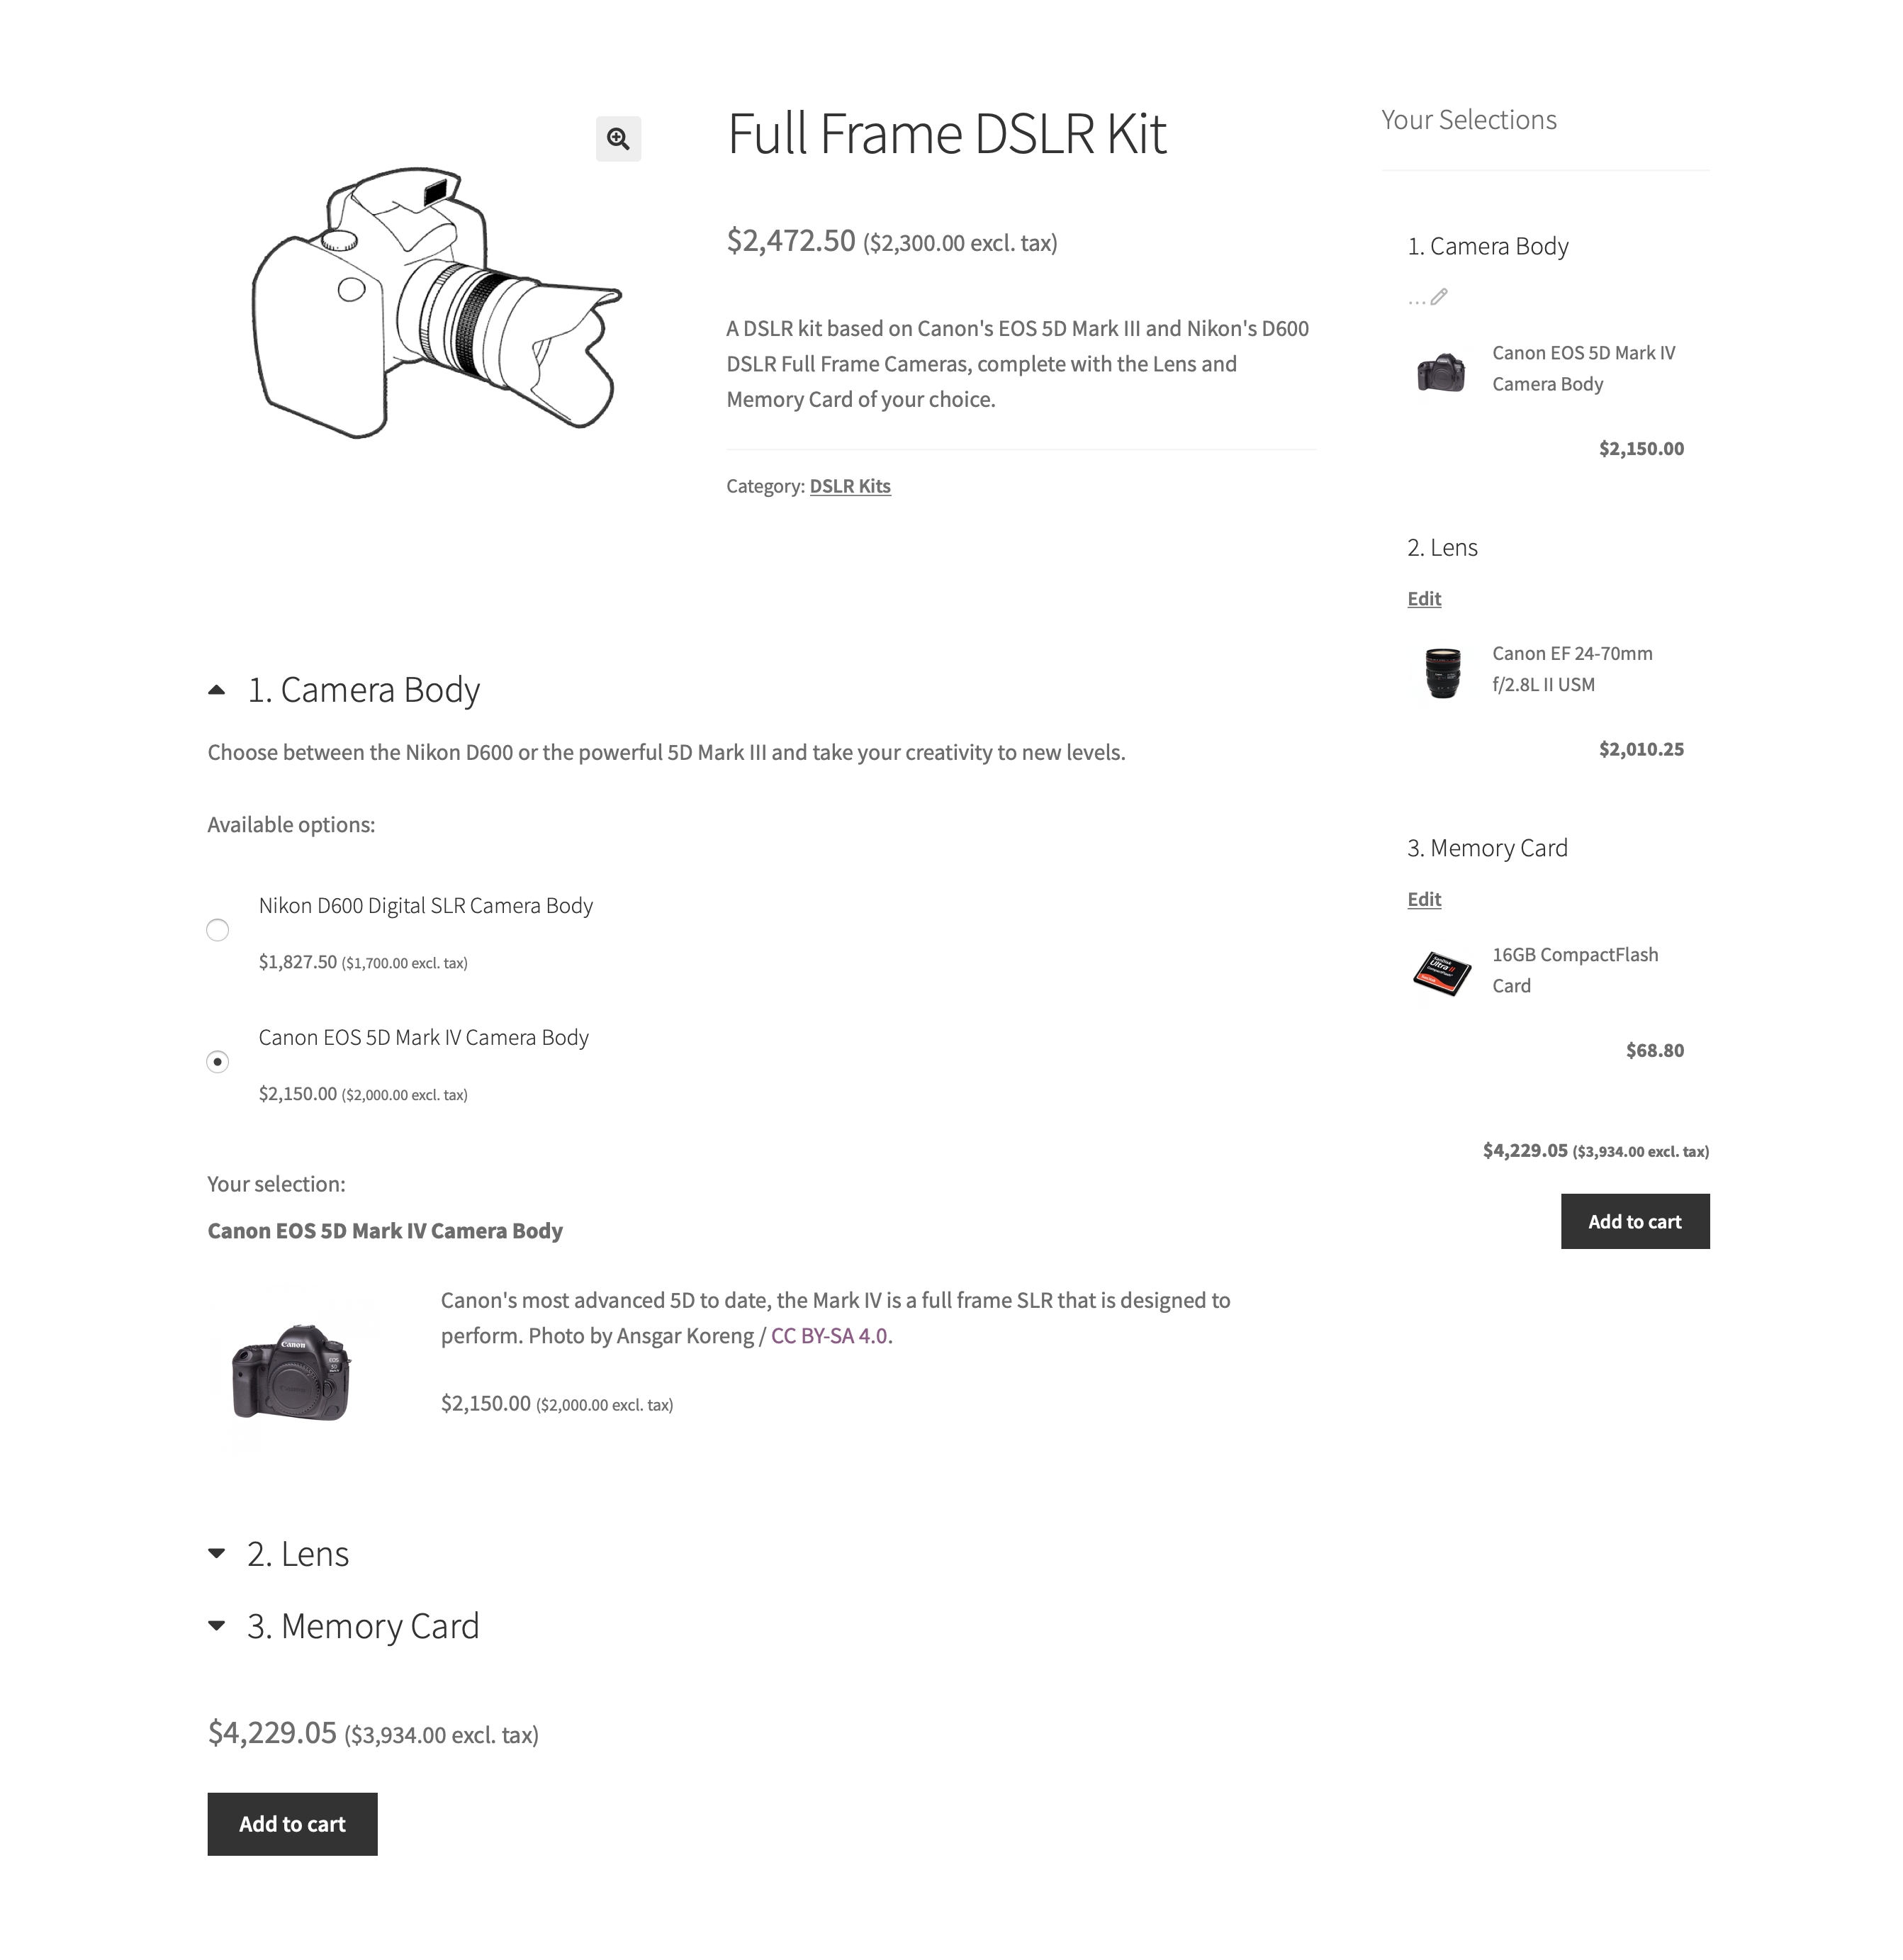
This guide demonstrates how to use Composite Products to create a Full Frame DSLR Kit that consists of a Camera Body, a Lens and an optional Memory Card.
Note that it would be possible to build a similar selection interface with the Variable type, by creating the Camera Body, Lens and Memory Card as Attributes and populating them with options. However, this would not allow you to manage the inventory of the chosen cameras, lenses and memory cards.
Plugins/Extensions Used
↑ Back to topConfiguration
↑ Back to topTo configure the Full Frame DSLR Kit composite product, follow these steps:
- Create the Composite
- Go to WooCommerce > Products and click Add Product.
- Enter a Title, Description and Short Description.
- Locate the Product Data panel and select the Composite product type.
- Define Components and Component Options
- Locate the Product Data panel and go to Components.
- Click Add Component to create a Component and name it Full Frame Camera Body.
- Add Component Options to the Full Frame Camera Body.
- Repeat the steps b-c for the Lens and Memory Card Components.
Dependent Component Options
To ensure that only compatible products can be selected and purchased together, Scenarios can be used to define valid combinations of Camera, Lens and Memory Card selections.
- Configure Pricing Options
The Full Frame DSLR Kit costs as much as the sum of its components:
- Locate the Product Data panel and go to the Components tab.
- Tick the Priced Individually option in the Basic Settings section of all Components.
- Go to the General tab and ensure that the Regular Price and Sale Price fields are blank.
- Configure Shipping Options
The chosen camera, lens and memory card(s) are shipped in their original boxes – no assembly is required:
- Navigate to the Product Data > Shipping panel.
- Choose the Composite Type > Unassembled option.
- Configure Layout Options
- In the Product Data panel, go to the Components tab.
- Select the Progressive layout.
- Open the Full Frame Camera Body Component, locate the Options Style drop-down and select Radio Buttons. Do the same with the Memory Card Component. For the Lens Component, choose Dropdown.
- Add Finishing Touches
Choose a Product Image, add some Gallery items and, finally, tweak the layout of the Full Frame DSLR Kit page.
Layout Tweaks
Most WooCommerce-compatible WordPress themes default to a two-column product page layout: The first column contains the main product image and gallery, while the second one is reserved for product details and options. This space-conserving approach works well for Simple and Variable products, which usually contain only a few form elements.
In contrast, Composite products tend to have longer forms requiring multiple steps/interactions to complete. Sometimes you may find that your theme’s two-column layout makes Composite products look space-constrained and hard to interact with. Some themes allow you to modify the layout of individual product pages to display product details and options in a single column. For example, if you are using Storefront, the Storefront Powerpack plugin includes options for:
- allocating more width to product form content, or
- stacking product form content below the main product image and gallery.
If you are experiencing layout issues with a Composite Product and your theme does not provide any per-product layout options:
- Navigate to Product Data > Components.
- Locate the Form Location option.
- Choose Before Tabs to stack form content after the product image and summary.
In most cases, choosing Before Tabs will allocate the entire page width to the form contents of your Composite. However, note that the Before Tabs option is not guaranteed to work reliably with all themes!
A similar result can be achieved with the free WooCommerce Stacked Product Layout plugin.
Result
↑ Back to top

Questions & Support
↑ Back to topHave a question? Please fill out this pre-sales form.
Already purchased and need assistance? Get in touch with us via the Help Desk!