
- What is Google Analytics 4 (GA4)?
- Step 1: Preparing for GA4 Installation
- Step 2: Creating a New GA4 Property
- Step 3: Setting Up a Data Stream in GA4
- Step 4: Configuring GA4 Settings
- Step 5: Installing the GA4 Code on Your Website
- Step 6: Verification and Troubleshooting
- Step 7: Understanding and Analyzing Your GA4 Data
- Summary
After building a website for your business, setting up Google Analytics 4 (better known as GA4) is a great way to understand your audience and better your commerce.
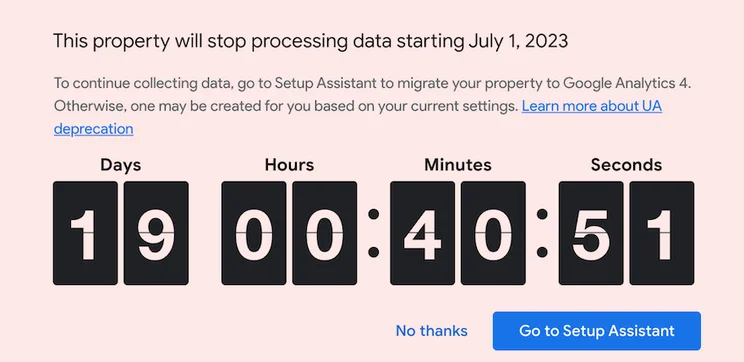
GA4 is the latest version of Google’s hugely popular web analytics tool. First introduced in October 2020, GA4 supersedes its predecessor, Universal Analytics (UA) – which Google has been phasing out. The search engine’s recommended deadline for GA4 adoption was 30 June 2022.
And since July 2023, UA no longer works – so, if you haven’t set up GA4 already, now’s the time.
Which begs the question: how do you set up GA4, exactly?
Don’t panic. Below, we’ve put together a simple, 7-step guide to all things GA4. We’ll walk you through what GA4 is, how it improves on the analytical scope and settings of UA, and – most importantly – how to install it on your website.
What is Google Analytics 4 (GA4)?
Designed to help brands and website owners gain more detailed insights into their audience and business performance, GA4 improves on UA in a number of ways. These include:
- Event-focused tracking: GA4 doesn’t just track page views, but user events – such as clicks, video plays, downloads, and form submissions – to enable a more comprehensive understanding of your audience’s behavior.
- Enhanced cross-platform tracking: GA4 improves your ability to track information across multiple platforms: including websites, mobile apps, and offline data sources.
- Machine learning capabilities: by harnessing the latest developments in AI, GA4 offers more powerful analytical tools – such as predictive metrics – to forecast what’s ahead.
- A privacy-centric approach: designed to reflect evolving user privacy expectations, GA4 comes equipped with features like consent mode and data controls: helping you comply with privacy regulations, and respect the preferences of your users.
- Better data exploration and analytics views: GA4’s user interface is more customizable – making reporting a more tailored experience, and offering a more flexible way to dive deep into your business’ data.
That’s what GA4 does – and how it improves on its predecessor.
Want to start making the most of all those benefits for your business? Read on to learn how to install GA4 in seven simple steps.
Step 1: Preparing for GA4 Installation
Since you’re here, we’re going to go out on a limb and presume you’ve already got a Google Analytics account, and that it’s connected to your website. If you haven’t, no problem – but we recommend checking out our article about how to add Google Analytics to a website, first.
A Google Analytics account – and perhaps, at the very least, a basic working knowledge of UA – are handy to start with. But before you begin installing GA4 on your website, the most important thing you’ll need is a strong idea as to how you plan to use GA4.
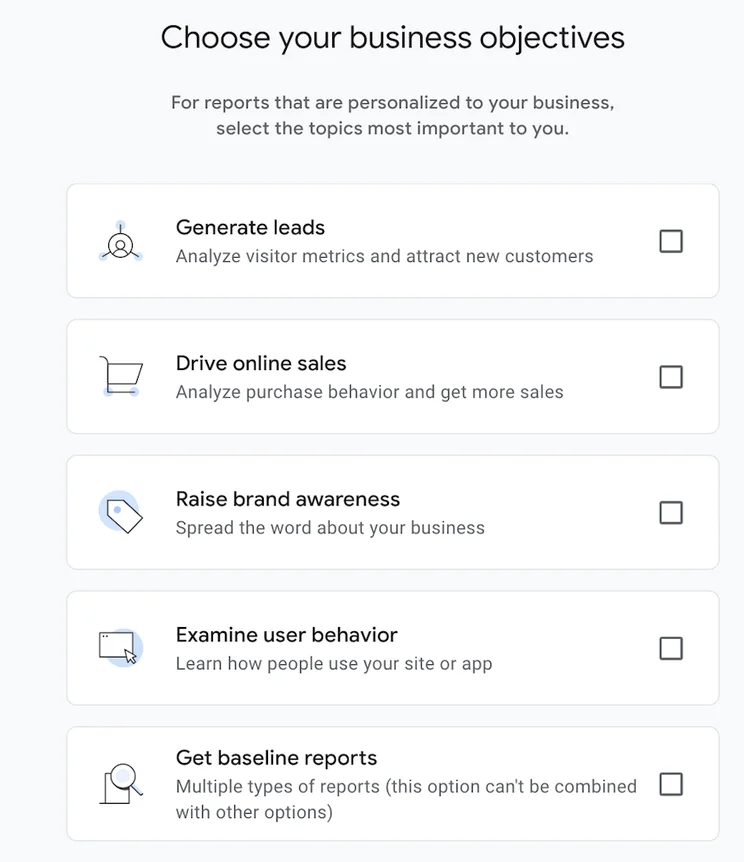
That’s because, as part of the process of configuring GA4, Google will ask you what your goals are. Are they to:
- Generate leads?
- Drive online sales?
- Raise brand awareness?
- Examine user behavior?
- Get baseline reports?
Knowing this now – and understanding your reasons for setting up GA4 – will help speed up and smooth out the process later.
Step 2: Creating a New GA4 Property
To create a new GA4 property, first log into your Google Analytics account.
(A GA4 property is a data tracking and analysis framework by Google. In essence – or at least in the case we’re talking about – it refers to your website.)
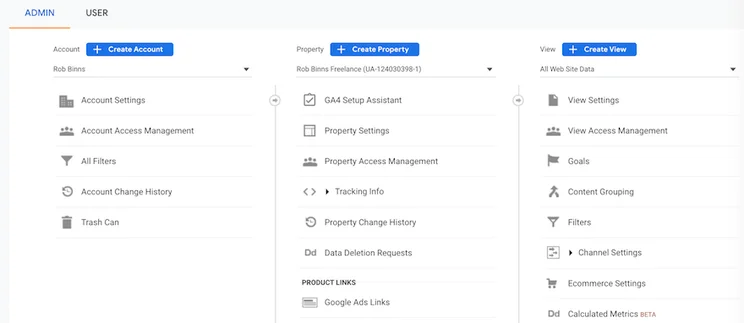
From the home screen, head to the button marked ‘Admin’ (it has a little cog next to it) and you’ll come to a screen allowing you to create an account, a property, or a view.
It’s that middle one – property – we’re most interested in, so go ahead and click the blue ‘+ Create Property’ button.
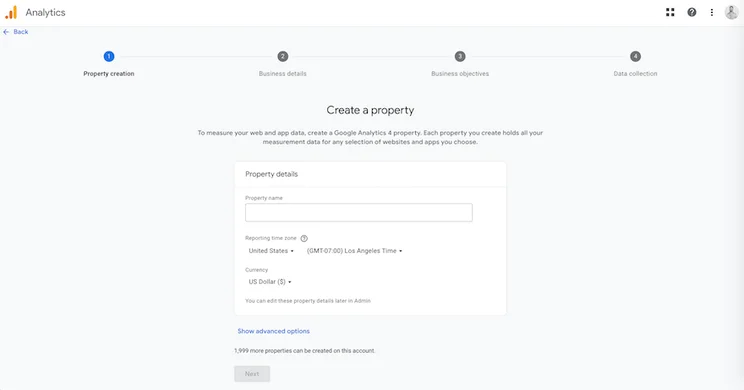
From there, you’ll be asked to give your property a name – as well as specify the time zone and currency you’ll be working in – on a screen that looks like this:
Do that, and you’ll be asked a few more basic questions about the size and nature of your business. You’ll also need to specify the industry you operate in, and how you plan to use GA4.
Step 3: Setting Up a Data Stream in GA4
After entering your business’s details and objectives, you’ll be asked which platform you’d like to collect data through: web, Android app, or iOS app.
Select your platform, and you’ll be prompted to set up a data stream. Enter your website’s URL, and give your new stream a name.
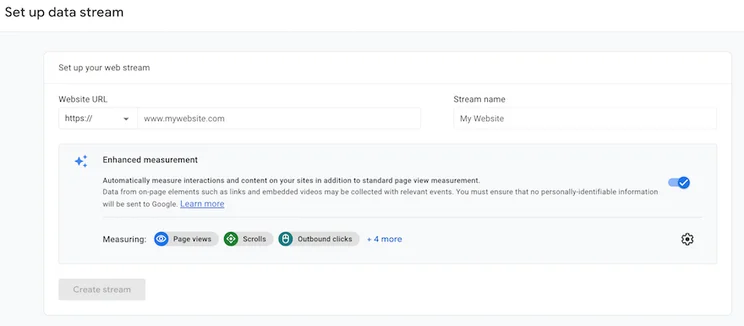
If you’d like, you can also enable Google’s enhanced measurement options. These allow you to collect additional data, including interactions with your site and content (such as scroll tracking, or file downloads.)
Step 4: Configuring GA4 Settings
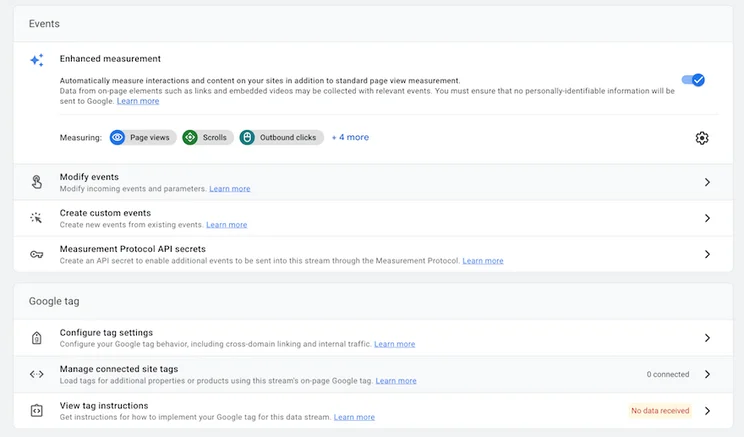
If you’ve kept up so far, you’ll now be presented with a screen displaying your stream’s basic details: name, URL, and both stream and measurement ID. Now, it’s time to get customizing.
From this page, you’ll be able to access GA4’s range of enhanced measurement tools and configure them to your liking. Additionally, you can set up custom conversion events to track your site’s key commercial performance metrics.
You can also tinker with the settings of your Google tag. From this page, you can:
- Configure your tag’s behavior: such as internal traffic and cross-domain linking.
- Manage connected site tags: load tags for any other GA4 properties you might have.
- View tag instructions: learn more about how to implement your Google tag for this data stream.
Step 5: Installing the GA4 Code on Your Website
You’ve set up your new GA4 property – nice work! But don’t start popping champagne just yet – because, unless that property is connected to your website, it’s not going to be delivering the data you need.
So, after you’re done configuring your GA4 property’s settings, hit the button that reads ‘View tag instructions’. This will take you to a screen that looks like this:
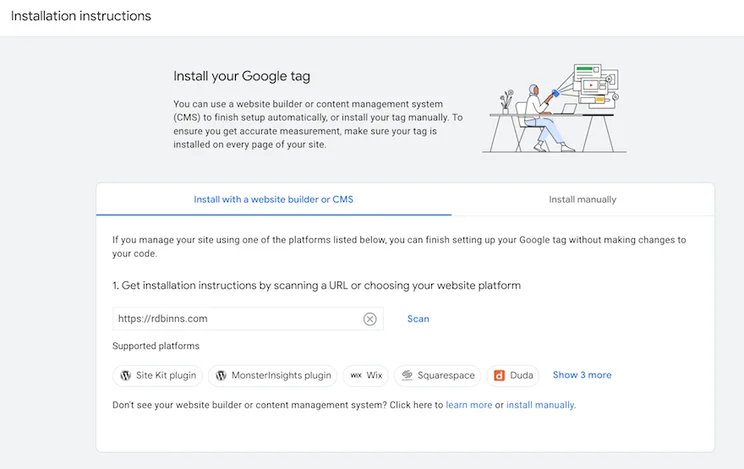
As you can see, there are two ways to install your Google tag:
- Using a website builder – such as Wix, Squarespace, or Duda – or a content management system (CMS): such as WordPress, Drupal, or Django.
- Manually.
Installing your Google tag with a website builder
If your site is powered by Wix, Squarespace, or Duda, then good news!
From here, you can finish setting up your Google tag without making changes to your website’s code. Simply click on the name of your platform where you see it in the ‘Supported platforms’ section and follow the prompts.
Lucky you – we’ve put together a whole guide dedicated to just that topic. Explore how to add Google Analytics to Shopify now – then, meet us back here for the final two steps! (Oh, and if you have a moment, check out our scoop on Shopify’s high-profile breakup with UA for its new squeeze, GA4 – it’s juicy stuff!)
Installing your Google tag with a CMS
Is your site built on Drupal? Or the free, open-source CMS Typo3? If so, Google makes it extremely easy for you to set up your Google tag. Same with users of one.com, or WordPress – who can continue installing their tag via the WordPress plugins Site Kit or MonsterInsights.
If your site runs on any of these CMS, click on your platform’s name in the ‘Supported platforms’ section – and follow the prompts to completion.
Installing your Google tag manually
If you’ve built your website from scratch – or use a website builder or CMS that isn’t on Google’s ‘supported platforms’ list – you’ll have to take a more hands-on approach.
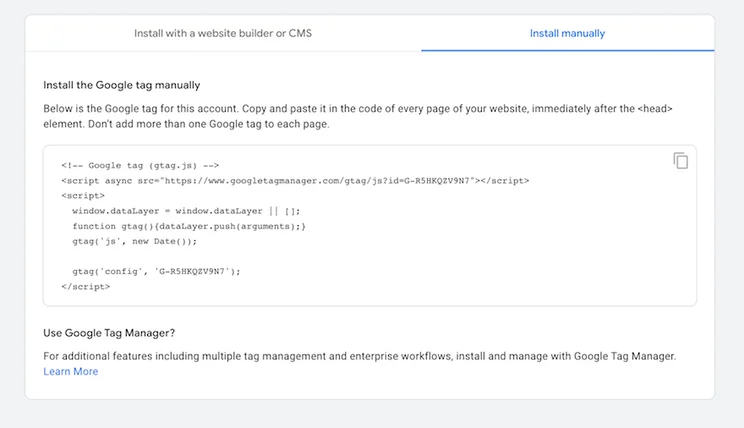
Select the ‘Install manually’ tab, and copy the Google tag that appears. Then, paste this snippet of code into every page of your website, immediately after the <head> element.
Step 6: Verification and Troubleshooting
Step 6 – verification and troubleshooting – is exactly what it sounds like. Time to make sure your GA4 code has been successfully installed on your website – and that everything is functioning exactly as it should be.
So head to your website and click through a few pages to generate some data. Then, go back to Google Analytics, click ‘Admin’ (look for the little cog in the bottom left!) and navigate to the ‘Property’ column. There, click on ‘Data streams’ to see your full list of data streams, and verify that your website’s data stream is receiving hits.
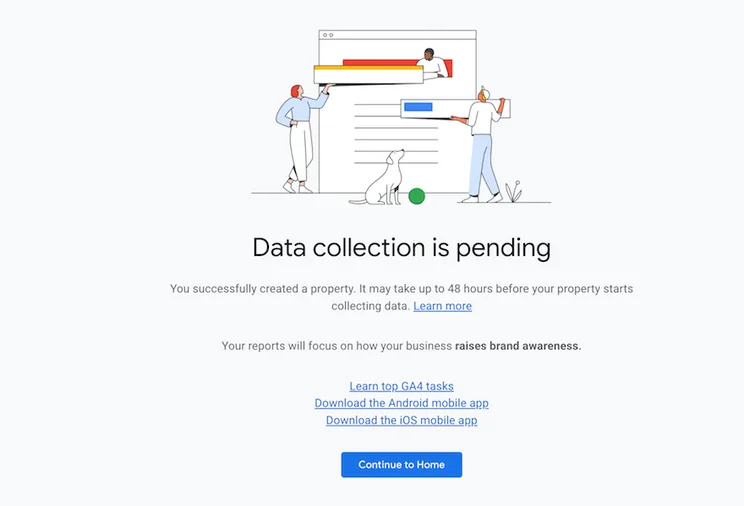
If it isn’t, it could point to an issue with your GA4 tracking code’s installation on your website. That said, data may take up to 48 hours to appear in the reports. So don’t fret if it isn’t showing up straight away.
Step 7: Understanding and Analyzing Your GA4 Data
Now you’ve added GA4 to your website, it’s worth getting to grips with its new-and-improved dashboard. The screenshot below (which, along with the hundreds of thousands of revenue, is from Google – not this humble writer’s website!) shows that, despite all the extra features and functionality, GA4 boasts a sleeker, smarter, more stripped-back aesthetic than UA.
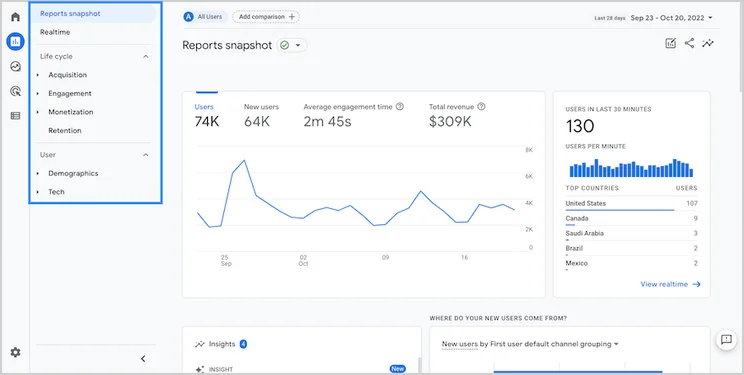
As a reminder, GA4’s dashboard provides insights into your website’s:
- Users and new users: the amount of people who visited your site in a specific time period – and how many did so for the first time.
- Sessions and session duration: the amount of visits to your website (and for how long).
- Traffic sources: the channels bringing users to your website or app: such as organic search, direct traffic, social media, or referral sources.
- Campaign performance: information about specific marketing campaigns: including each campaign’s number of visits, goal completions, and conversion rates.
- Bounce rate: The percentage of single-page visits where users left your website or app without interacting further.
…plus so, so much more. When it comes to GA4, simply reading about what you can do doesn’t do any of it justice. Our recommendation? Log in, get stuck in – and give it a go for yourself!
Summary
Looking to set up GA4 on your website – and boost the way your business or brand collects, uses, and reports on data? Here are those seven steps again:
- Prepare for GA4 installation
- Create a new GA4 property
- Set up a data stream in GA4
- Configure GA4 settings
- Install the GA4 code on your website
- Verify and troubleshoot
- Understand and analyze your GA4 data
So good luck, enjoy – and let us know how you got on installing GA4 on your website by chiming in via the comments section below.


0 comments