How To Build a Website on GoDaddy in 2024: The Ultimate Guide
If you click to purchase a product or service based on our independent recommendations and impartial reviews, we may receive a commission. Learn more
Need a beginner-friendly website builder? Looking for a price plan that won’t break the bank? Have limited time to build your website? If your answer is yes to any of the above, I recommended building a website on GoDaddy.
With its value for money pricing and easy-to-use interface, GoDaddy is an accessible website builder that’ll help you set up a professional page in no time. Even better, you don’t need any technical know-how, since GoDaddy’s editor is simple to pick up.
To get started, here’s our guide to building a website on GoDaddy – covered in only 6 simple steps!
1. Create Your GoDaddy Account
You can’t do anything until you have an account! Luckily, GoDaddy’s sign up process is simple. From the homepage, I scrolled down and clicked on the “Create Your Site” button to get going.
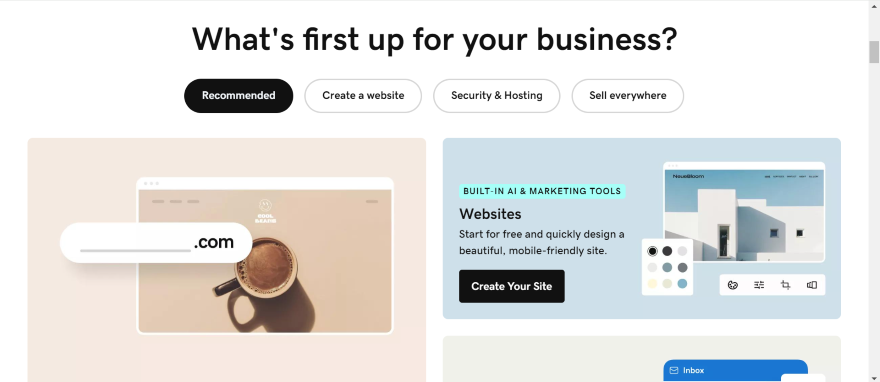
One great thing about GoDaddy is that you don’t need to give your card details to sign up. The platform offers a free website builder, enabling you to create a website without spending a cent. However, this free plan does have its limitations, which I’ll touch on later, when I discuss pricing.
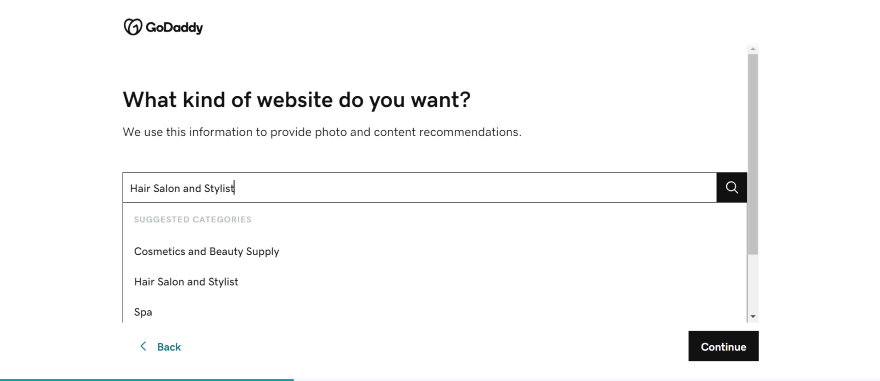
I signed up to GoDaddy via email address, though you can also sign in with Facebook or Google. GoDaddy then asked me three questions about my website: what features I wanted, my website category, and the name of my store.
2. Set Up With GoDaddy’s Editor
After answering the questions, I was sent to GoDaddy’s editor, where a new website was waiting for me. GoDaddy ADI, the platform’s AI website builder tool, had generated a unique website template based on my answers.
This AI-powered feature is useful if you’re strapped for time, because it was able to generate a new website in under 30 seconds during our in-house testing process!
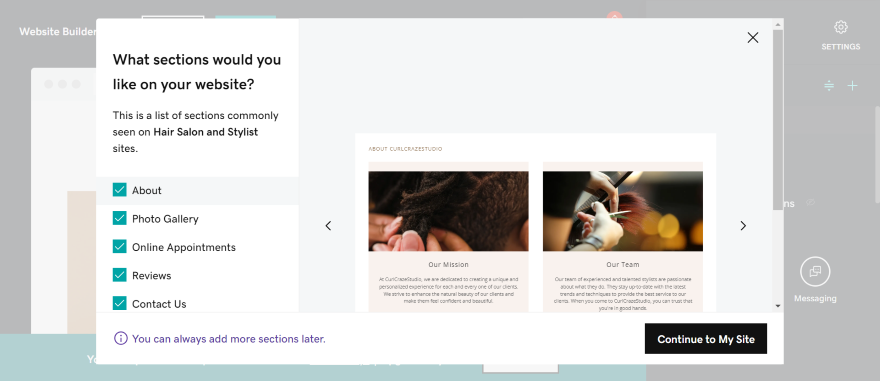
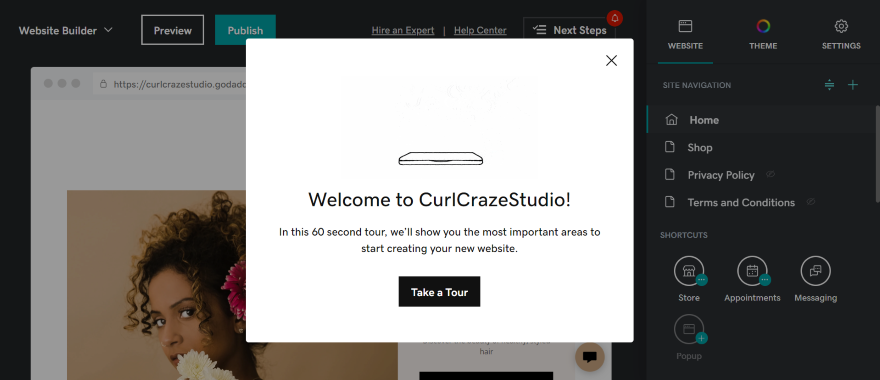
Since GoDaddy ADI will have already generated your base template, you can use this time to get to grips with GoDaddy’s editor. During the onboarding process, I encountered a helpful tutorial pop-up that took me on a website tour. It introduced me to the “Website” and “Theme” tabs (which will come in handy later) and showed me how to add sections.
Next, it was time to start replacing GoDaddy’s placeholder content with my own. To add new photos, I double clicked on a placeholder photo and pressed “Change image.” This also caused a new “Image” sidebar to appear on the right hand side of the editor.
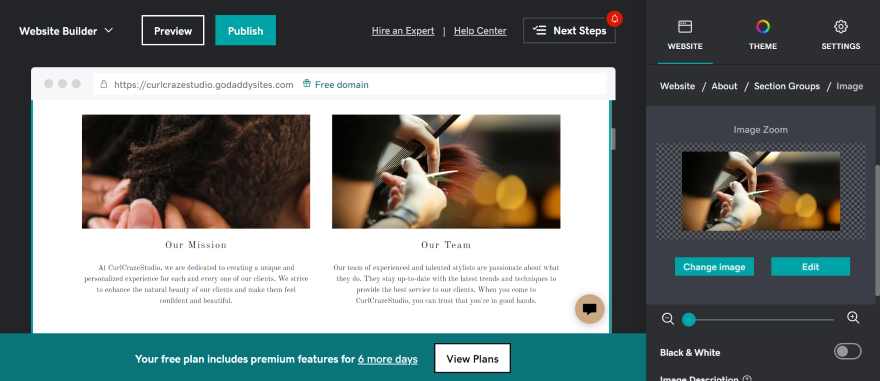
Clicking “Change image” triggered GoDaddy’s Photo Library. In this photo library, you have three key ways to add media:
- Upload your own photos from your device
- Choose professional imagery from GoDaddy’s stock library
- Transfer media from your Facebook or Instagram accounts
Once you’ve uploaded your photos in your preferred method, click “Insert.” Your new photo will now appear on your website!
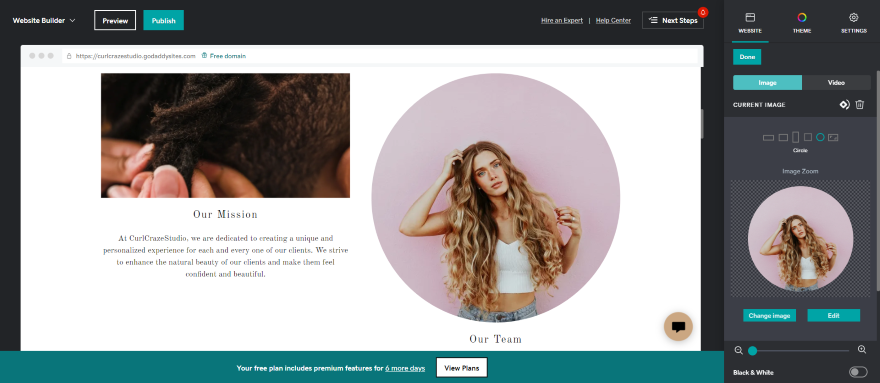
Changing the text is just as easy. I could click on a text box and edit the text directly from there, or tweak my text from the “Section Groups” menu in the sidebar. Either way works fine!
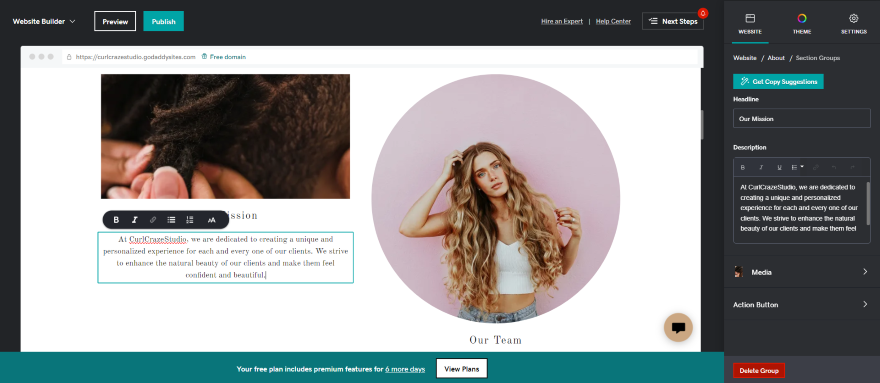
If you find writing for the web difficult, you can use one of GoDaddy’s AI tools to help. Ever since the release of GoDaddy Airo in late February, you can now create AI-generated text for your website.
To give this feature a spin, I clicked on “Get Copy Suggestions” in the sidebar. If you’re not happy with what’s generated, you can keep clicking on “Suggest Another Option” until you’re satisfied. To finish, select “Use This Suggestion” and it’ll be added to your website! Bear in mind, you can also tweak the text to make it more suitable for your business if needed.
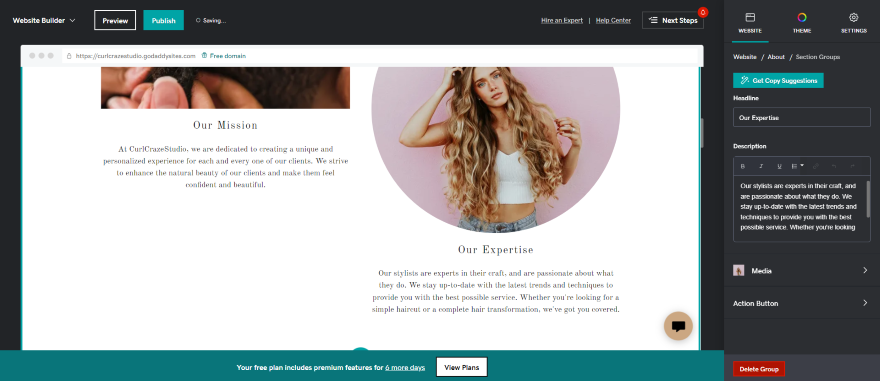
After editing your text and photos, you can start adding new sections. These are pre-designed blocks for your website that change the structure of your page. For instance, you can add a “Content Form” section to your homepage to create a sign-up form block.
To start, you’ll need to look for a green plus sign on your template to do so. Additionally, you can move pre-existing sections up and down by clicking on the arrows located in the green box.
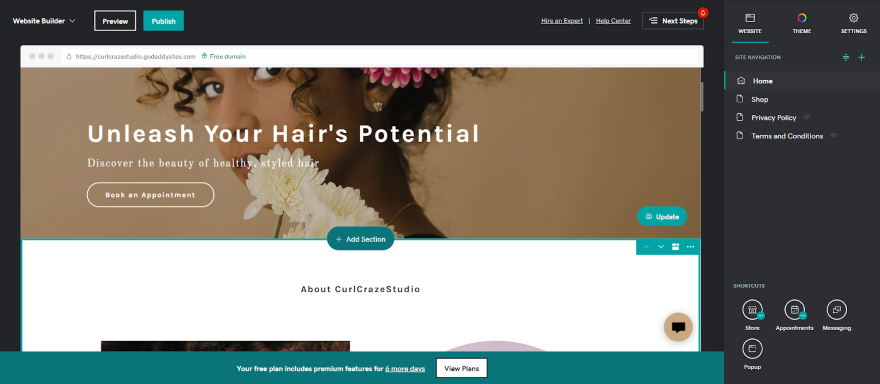
Once you’ve located the plus signs and pressed “Add Section,” a new menu will appear. You can start looking through GoDaddy’s 35 different sections and adding them to your landing page. Section examples include:
- Photo gallery – To display high-quality imagery in an enticing way.
- Contact us – You can add a contact form section to your website alongside important details like addresses and phone numbers, providing an easy way for website visitors to contact you.
- Featured products – If you have an online store, you can highlight your best products.
- Countdown timer – Ideal if you have an exciting event or product release coming up.
- Menu/price list – A great opportunity to showcase key products or services and how much they cost.
- Reviews – This will help you build social proof. You can add positive testimonials to your website from past clients.
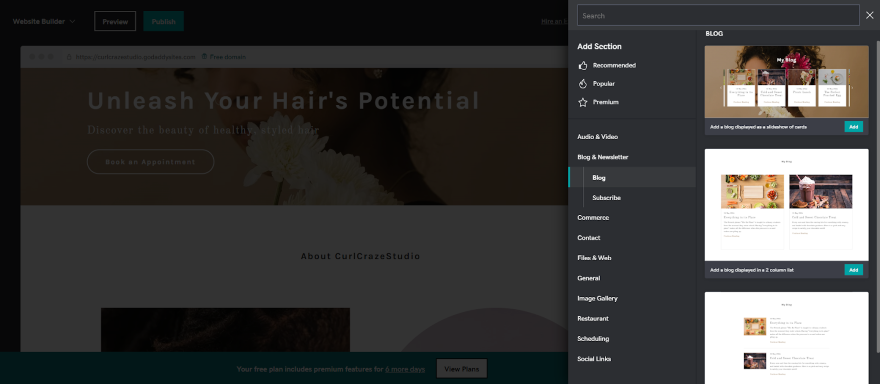
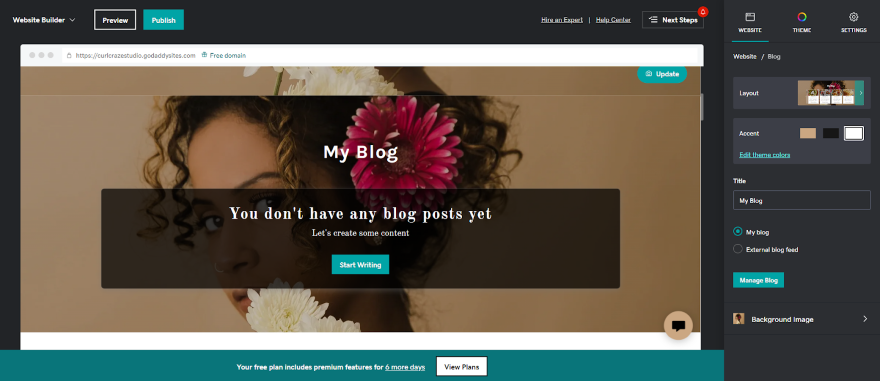
After finding the section I wanted, I could click on the “Add” button and make it appear on my page – it’s as simple as that!
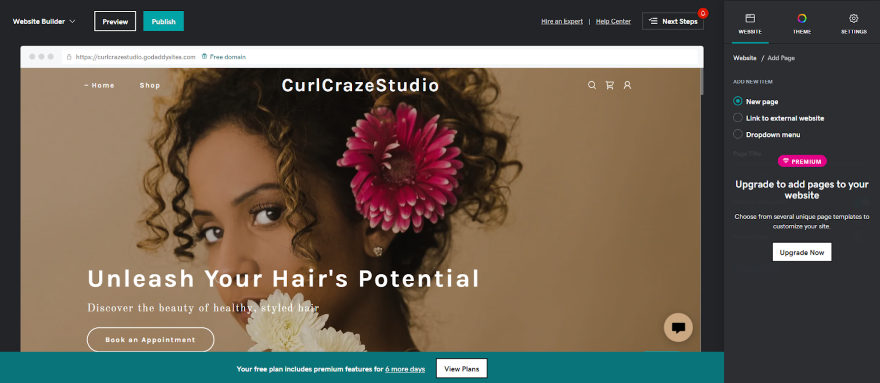
If you want to add more pages to your site, you can add them from the “Website” tab. Look for the plus symbol next to “Site Navigation” and give it a click. You can add a page from there!
However, please note that you have to be on a paid GoDaddy plan to add additional pages. On the Free plan, you can only use the pages that GoDaddy has generated for you.
However, aside from being able to add and adjust sections, replace content, and slightly tweak the site’s design, there are not a huge number of ways to change GoDaddy’s AI generated template.
If you want more creative control, go for a builder like Wix or Squarespace instead since they offer wider customization options.
Can I Change My GoDaddy Theme?
If you’re not 100% sure about your GoDaddy ADI template, you can always switch to another theme.
I wanted to see what designs were available, so I clicked on “Try a new look” in the “Theme” tab. Though there were 22 designs to choose from, I didn’t see a huge variation between the themes.
If you’re looking for more sophisticated styles, I’d recommend using Squarespace instead of GoDaddy. The platform is known for its stylish templates equipped with countless customization options.
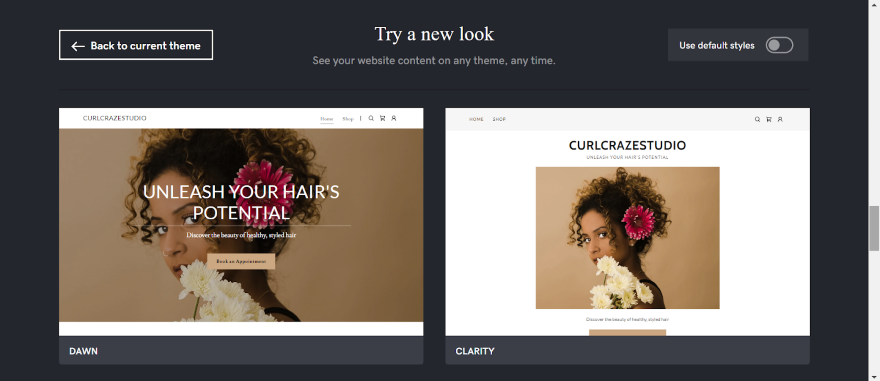
Once I hit the “Select” button on my chosen theme, I could continue to tweak my website from the editor page, changing the buttons, colors, and fonts.
3. Check Out GoDaddy’s Pricing Plans
Now that you’ve gotten used to GoDaddy’s interface, it’s time to look at GoDaddy’s pricing plans and pinpoint which features are most important to you.
Building a website on GoDaddy is great value for money, with the website builder’s cheapest plan priced at only $10.99 per month (billed annually). Below are GoDaddy’s three main plans:
| Basic | Premium | Commerce | |
|---|---|---|---|
| Price | $10.99/mo (billed annually) | $14.99/mo (billed annually) | $20.99/mo (billed annually) |
| Plan renewal price (after one year) | $12.99/mo (billed annually) | $22.99/mo (billed annually) | $26.99/mo (billed annually) |
| Best for | Simple, one-page websites and basic marketing options | Appointment websites and improved marketing options | Online stores and advanced marketing options |
| Key features | •Connect a custom domain •Built-in SEO •Integrated inbox and website chat boxes •Send 100 emails/mo | •Book recurring appointments •Accept payments •Create social media ads •Send 25,000 emails/mo | •Sell unlimited products •Sync inventory across channels •Automatic tax calculation •Send 100,000 emails/mo |
Overall, I recommend the Basic plan if you need a simple or informational website that only requires a few pages, while the more advanced plans are best if you will be accepting payments online.
The Premium plan enables you to set up regular appointments and receive online payments from customers, while the Commerce plan comes with key ecommerce tools for online stores.
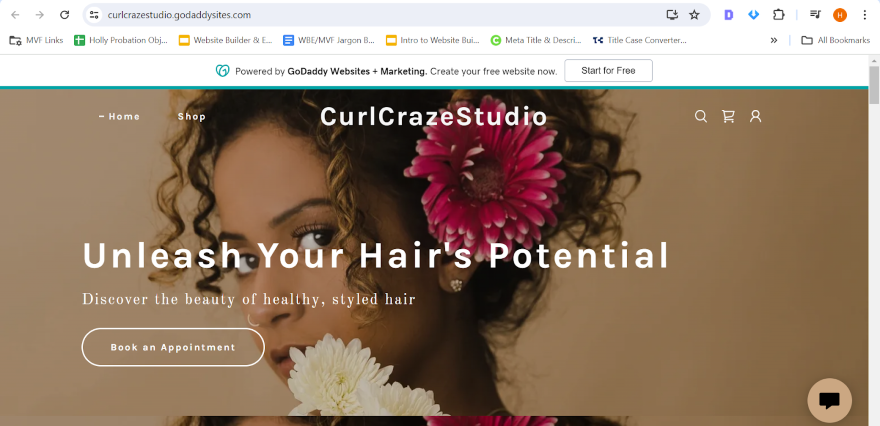
If you’re considering staying on the free plan, I would advise against it. Though it can help you test out GoDaddy’s offerings, it will make your website look unprofessional. For instance, your website will feature GoDaddy ads, and your website address will end with “godaddysites.com.”
What About Website Domains?
Your website domain helps people find you online, so you’ll need to choose a domain name for your business.
If you don’t have a domain and are struggling to come up with one, you can use GoDaddy’s AI generator for help. I headed to the front page and immediately found a link to the tool, clicking on “Try AI Domain Search” to get started.
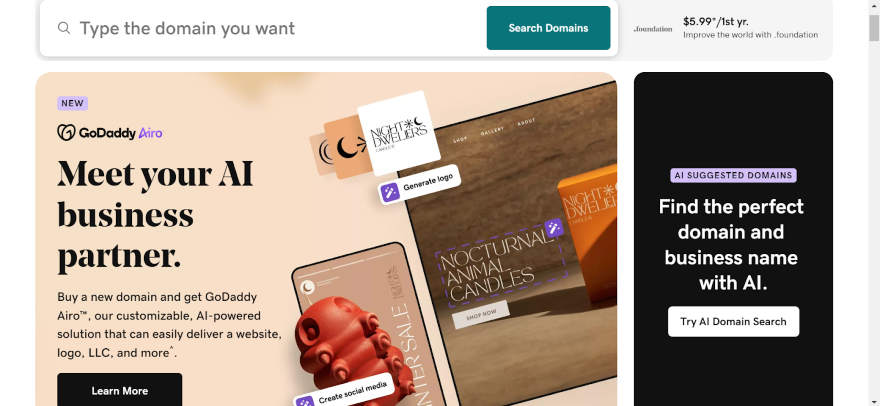
The tool will ask you for a prompt related to your business. I asked for “A hair salon specializing in contemporary cuts, blow outs, and treatments.” I then clicked on the magic wand button, and hey presto, my domain ideas appeared in front of my very eyes!
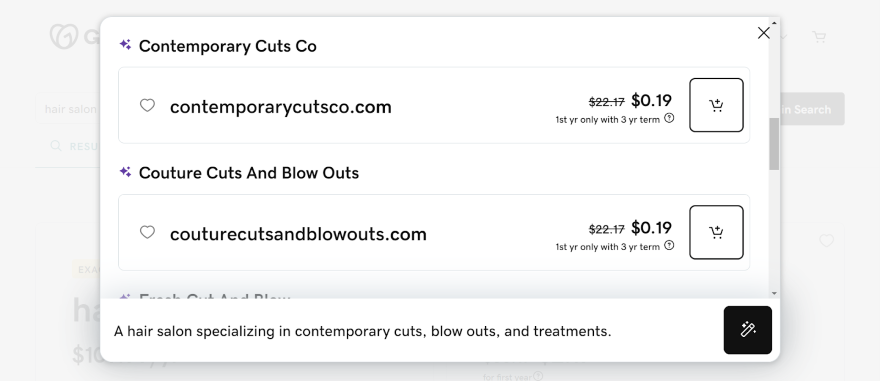
If you like one of GoDaddy’s domain names, you can buy one for your website. But what do you do if you already have a domain?
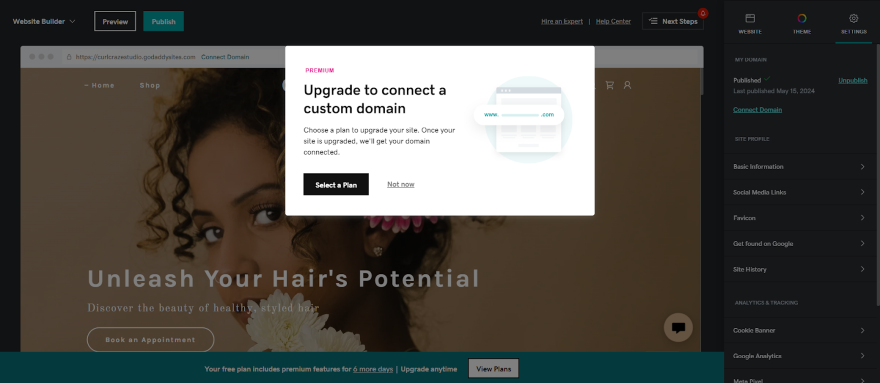
If that’s the case, you can connect your custom domain with your GoDaddy website on any paid plan. From your editor, click the “Settings” tab and look for the “Connect Domain” button. Afterward, you can follow GoDaddy’s instructions to get your domain connected.
Need further help with your domain? Read our guide to domain names to find out more
4. Add Additional Functionality to Your GoDaddy Website
Do you need additional functionality on your GoDaddy Website? If that’s the case, you can add online stores and booking functionality to your site. Let’s go into more detail:
How to Set Up GoDaddy Online Stores
To add an online store to GoDaddy, you need to be on the Commerce plan to access GoDaddy’s key sales features. Once you’re signed up to the plan, you can continue with the following steps.
From the editor, head to the “Website” tab and locate “Shortcuts” near the bottom of the screen. Then, tap the “Store” icon and press “Manage Store” to be redirected to your store’s dashboard.
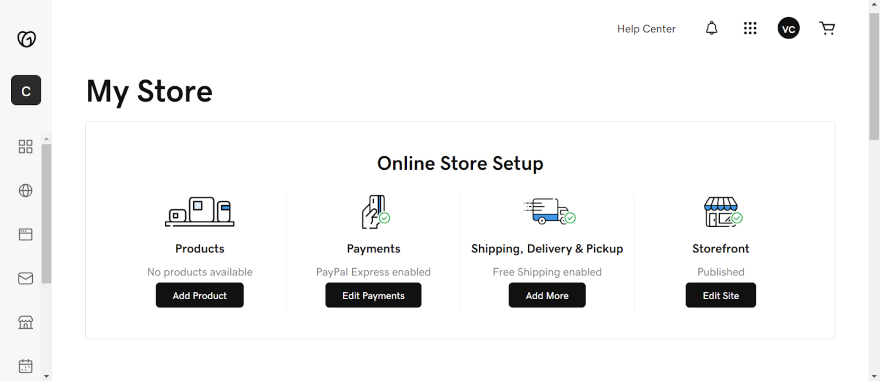
From this page, I was eager to upload my first item, so I clicked “Add Product” to get going.
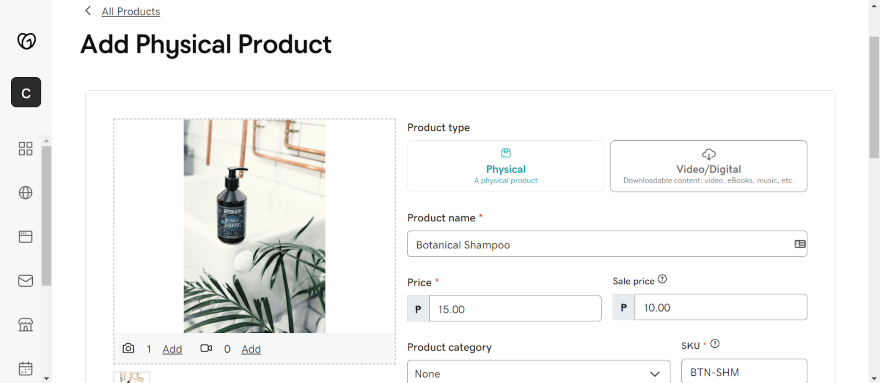
I worked from top to bottom when filling in my item details. Here are some of the key things you can do:
- Mark whether it’s a physical or digital product
- Upload high-quality product photos
- Add product descriptions
- Specify the pricing and sale pricing
- Add SKUs
- Add tax categories
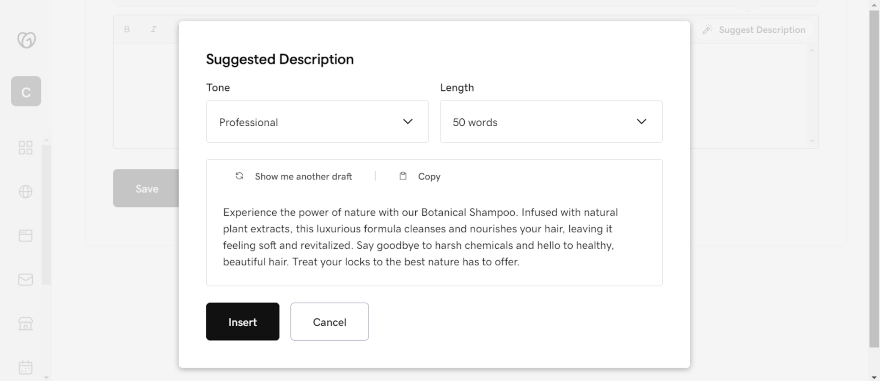
If needed, you can use GoDaddy Airo to generate AI product descriptions. I gave the tool a go by clicking on the magic wand button above the description text box. Additionally, I could also choose a specific tone of voice from a drop-down list, and specify my ideal word count.
Once you’ve filled in the details for your first product, scroll to the bottom and click “Save.” You’ll be redirected back to your product inventory.
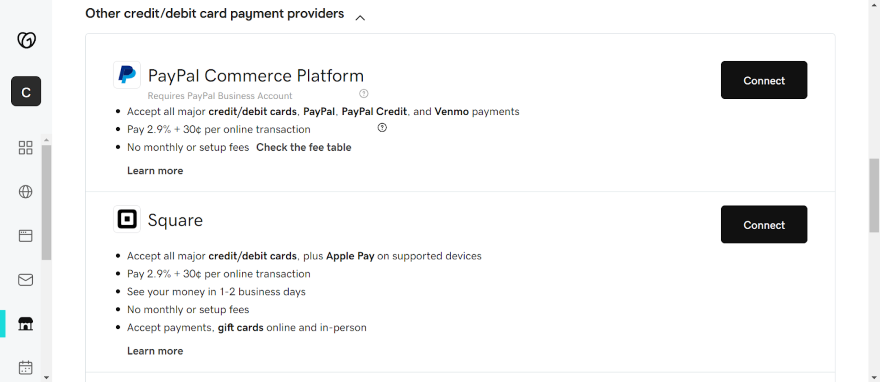
Aside from your inventory, you need to set up payment methods to accept payments online. To do so, head back to your store dashboard and click on “Edit Payments.”
On this page, you can connect payment methods like PayPal, Stripe, and Square. You’ll also come across GoDaddy Payments, the platform’s all-in-one payment solution, which accepts all major credit and debit cards along with Google Pay and Apple Pay.
To set up a specific payment method, click on the “Connect” button that’s next to your payment provider of choice.
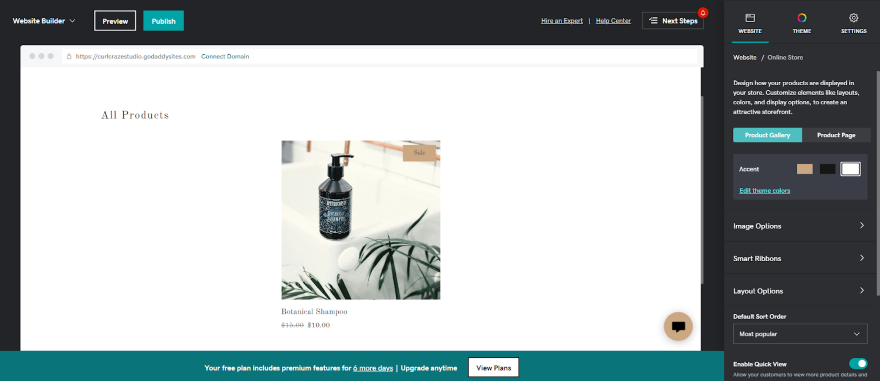
Once you’ve added items and sorted out payments, don’t forget to head back to the editor to see how your store is presented on your website. Check that your “Shop” page is running smoothly. You could always add an ecommerce section to your homepage and showcase featured products there too!
How To Set Up Appointments on GoDaddy
You can also use GoDaddy to make a bookings website. To monetise online appointments on GoDaddy, you need to be on the Premium plan, which enables you to set up appointments and accept payments online. Already on Premium? Let’s delve into how you can add appointments on your GoDaddy website.
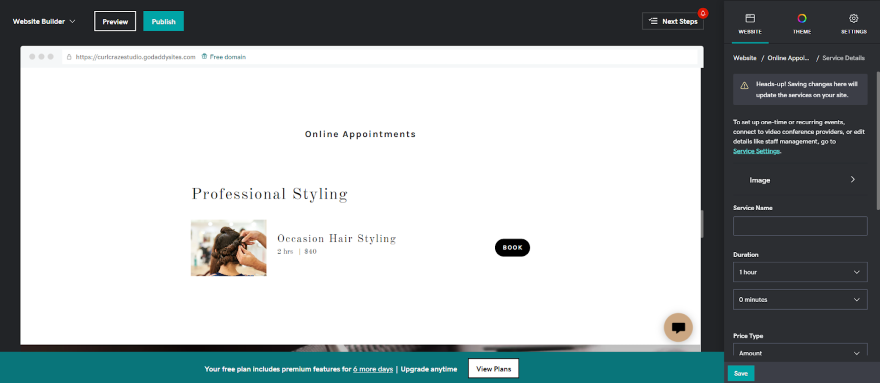
From the editor, go to “Shortcuts” under the “Website” tab and click the “Appointments” icon. Next, tap “Add Service,” and GoDaddy will whisk you away to another page where you can set up your first service!
On this page, I could choose whether my service was:
- An appointment – A one on one session with a client, like a therapy session or business consultation.
- A one-time event – A significant event that is likely to only happen once. This could include a corporate or educational webinar.
- A repeating event – Events that happen regularly, such as weekly pilates classes.
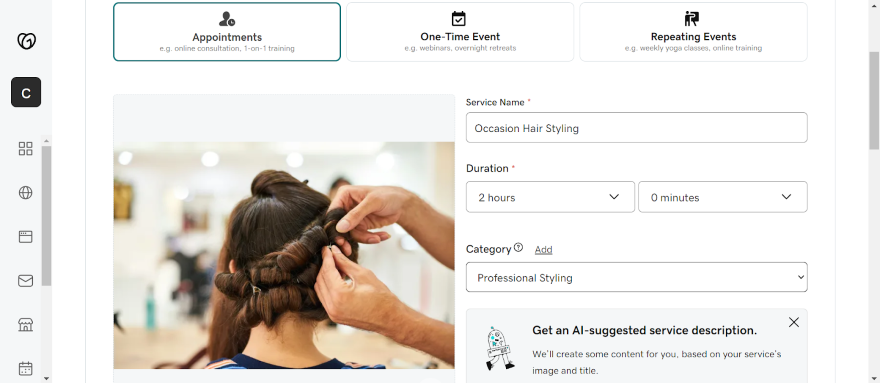
Since my test site revolves around hair styling, I opted for the “Appointments” option. From there, I had plenty of options to play around with. I could add:
- A photo of the service
- The service name
- The service duration
- The category the service falls under
- A description of the service (you can also AI-generate the text)
- The location of the service (can be physical or digital)
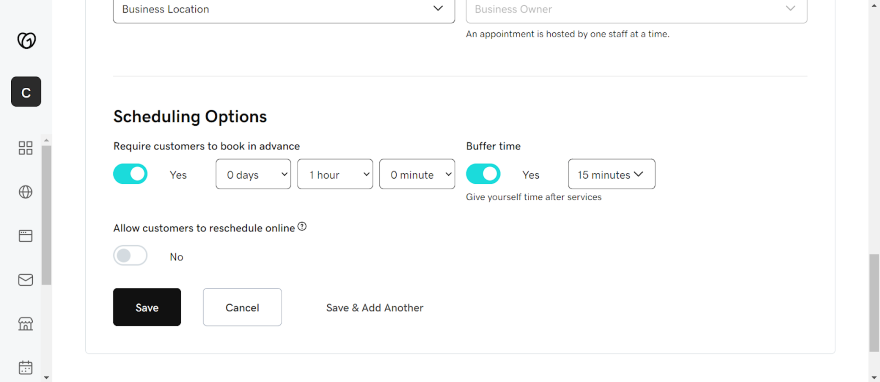
Once you’re done, click “Save” and you’ll be redirected back to your services dashboard. It’s now time to head to the editor to see how appointments look on your website.
When GoDaddy ADI created my website, it had already added an appointments section to my homepage. However, if you don’t have one, you can still add it in yourself as you would with any other section. Be aware that you’re only allowed to have one appointments section on your entire website, so place it wisely!
5. Market Your Website With GoDaddy
In layman’s terms, SEO ensures that your website shows up on search engines like Google.
To achieve this, your GoDaddy website should feature targeted keywords that are related to your business. For instance, if you’re selling pet products for dogs, you would target phrases like “dog products,” “dog supplies,” or “dog food.”
But will GoDaddy cover your SEO needs? Well, GoDaddy’s paid plans all come with built-in SEO tools. To access these tools, I went to the “marketing” section on my dashboard and clicked the “SEO” button, where I could access the tool.
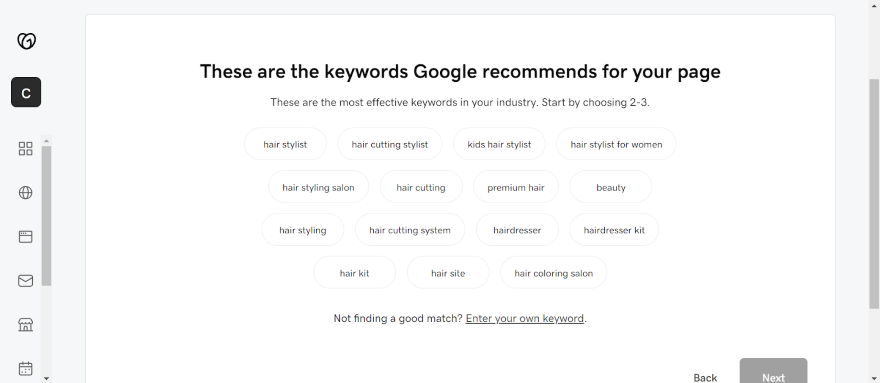
On this new page, I clicked the “Start” button, and had to answer one key question about my website: Was I serving customers in a specific location? Or was I serving customers everywhere? After answering, I received a list of Google-recommended keywords based on my business.
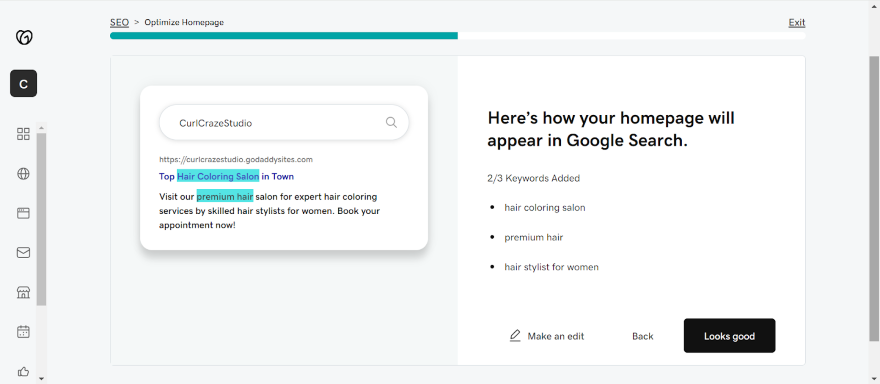
Afterward, I clicked the “Next” button and was given a unique meta title and meta description for Google Search (this is the title and description that will represent my webpage on a Google search result). If you’re not happy with the text, you can also click the “Make an edit” button to tweak it slightly.
On the next page, I had to edit my website’s headline and make sure it contained one of my keywords. There is a 75 character limit, so keep it short and snappy. Additionally, the following page will ask you to add these keywords to your website’s content too.
After completing these steps, you have the chance to review all of your changes. For SEO best practice, make sure that the keywords flow organically in your text. Google penalizes keyword stuffing, so only add keywords where it makes sense.
Happy with each section? If that’s a yes, you can hit the “Done” button to add these changes to your site!
2. Social Media Marketing
With SEO out of the way, you can move onto the fun part: growing your business on social media.
GoDaddy’s key social media tool lets you create professional posts to share on platforms like Facebook, Instagram, and Google. To test it out, go to “Marketing” on your dashboard and tap “Social Posts.”
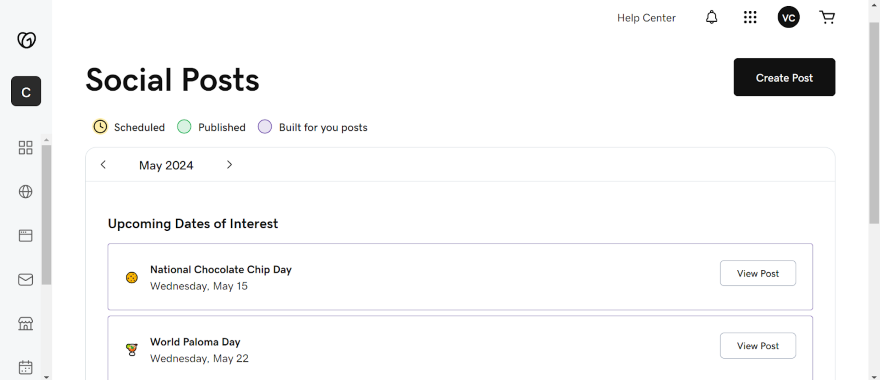
Click on the “Create Post” button to get started! To choose a professional template for my post, I also clicked on the “template” button to choose a ready-made design that I could customize. I suggest using the search bar to look for designs that fit your industry.
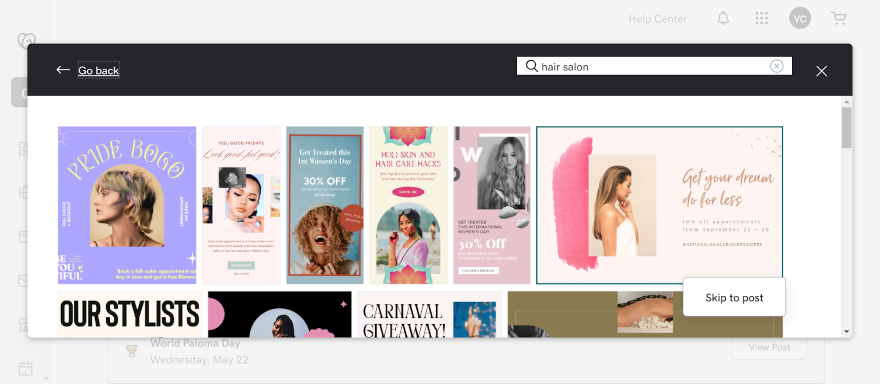
After selecting a template, you’re taken to GoDaddy Studio’s editor, where you can start tweaking your design. I could double click on text boxes to change the copy, crop photos or add shadow to them, and add cool graphics to my design.
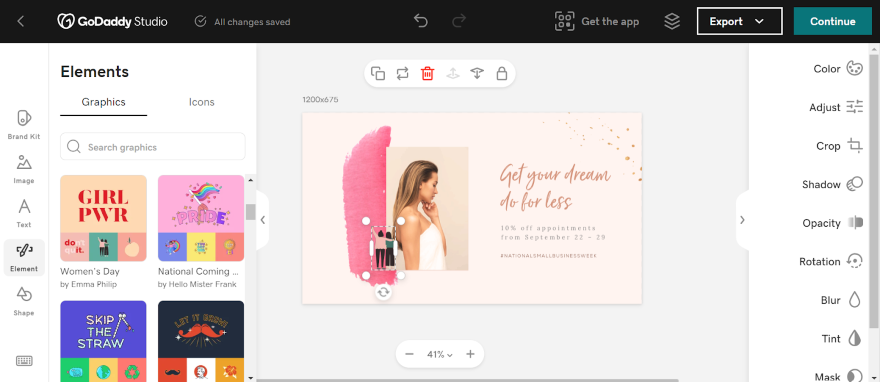
Now that you’ve edited your design, hit the top right “Continue” button and you’ll be taken back to the “Create a Social Post” page. Here, you can create a unique caption for your post and add a hyperlink, product, or video. Afterward, click “Preview Post” to see how it will look.
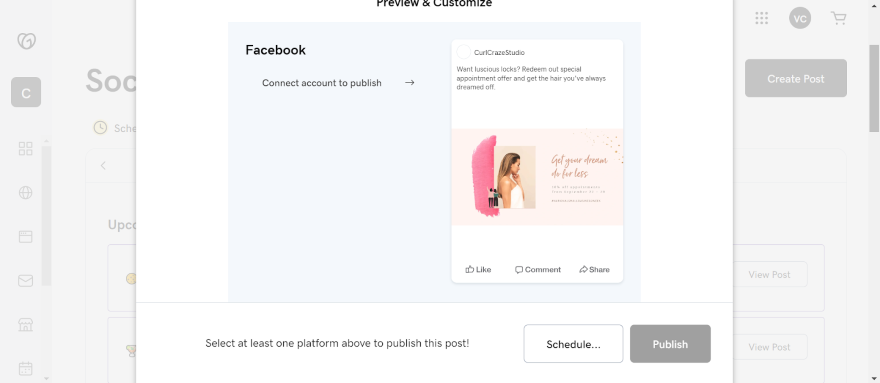
On the “Preview & Customize” page, you can connect your account with your chosen social media account. Once you’ve done that, hit “Publish” to post your graphic straight away, or click the “schedule” button to post it at a specified date and time.
3. Email Marketing
Before you move on, it’s worth checking out GoDaddy’s Email Marketing tool, which lets you create, send, and manage professional campaigns straight from your dashboard. This tool will help you develop an effective email marketing strategy from your website.
Head to your dashboard, go to “Marketing,” and click on “Email Marketing.” A new page will appear.
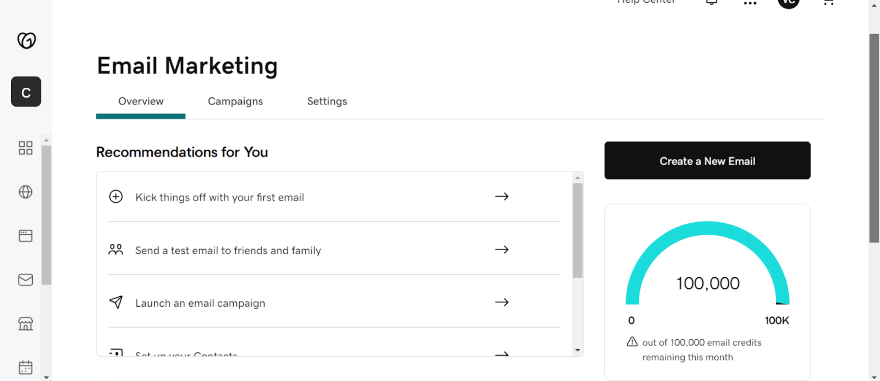
To create your first campaign, click on the “Create a New Email” button. Since this will be your first email, click on “Build Your Own” underneath the plus icon. From here, you can start building your base design.
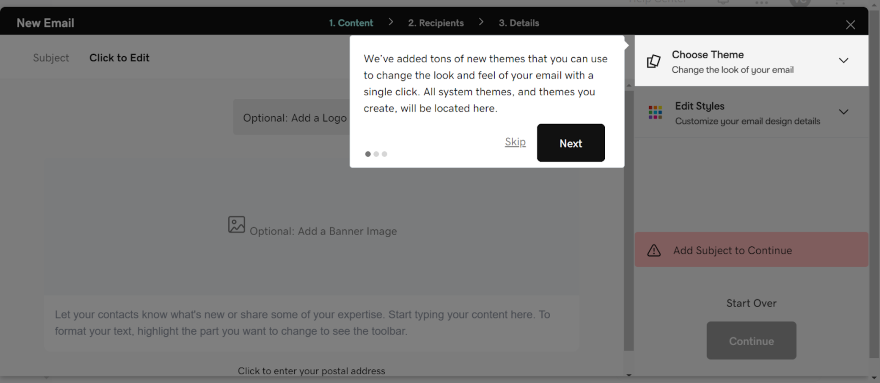
First of all, I had to add a subject line, upload a logo, and add an enticing banner image. If you don’t have a logo already, here’s a quick tip – click on “Add a Logo,” then press “Create a free logo.” GoDaddy will help you make a logo from scratch!
To add sections to your email, click on the green plus sign. You’ll find it underneath your header photo. From here, you can add:
- HTML
- Image templates
- Layouts
- Text
- Images
- Products
- Buttons
- Dividers
Click on the section you want and it’ll appear in your email. You can use the right sidebar to tweak its appearance. If you’re editing text, you can click directly on the text box and tweak it from there.
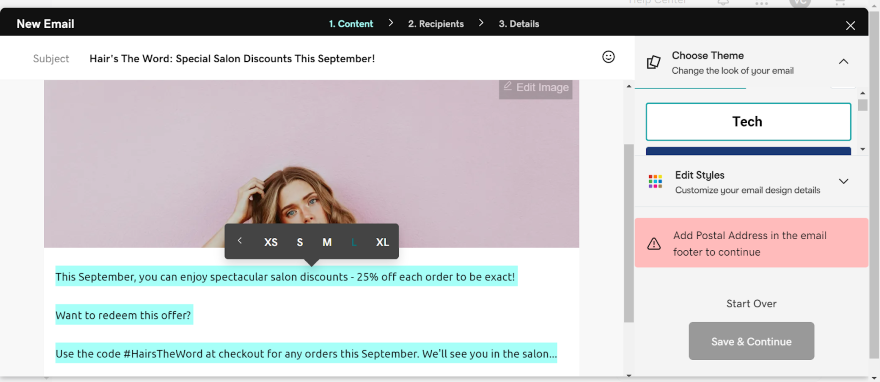
For further design options, click on the “Choose Themes” tab to experiment with different looks, or click on the “Edit Styles” tab to change specific design features such as background colors, primary and secondary fonts, or the appearance of your buttons. Your design should reflect your unique brand identity, so don’t be afraid to spend a bit of time on it.
On the other hand, because GoDaddy’s provides a set of pre-made themes, it can be quite time consuming selecting one that best reflects your business and website design. For more brand consistency, I recommend Squarespace’s email marketing tool instead. It lets you pull design elements from your website!
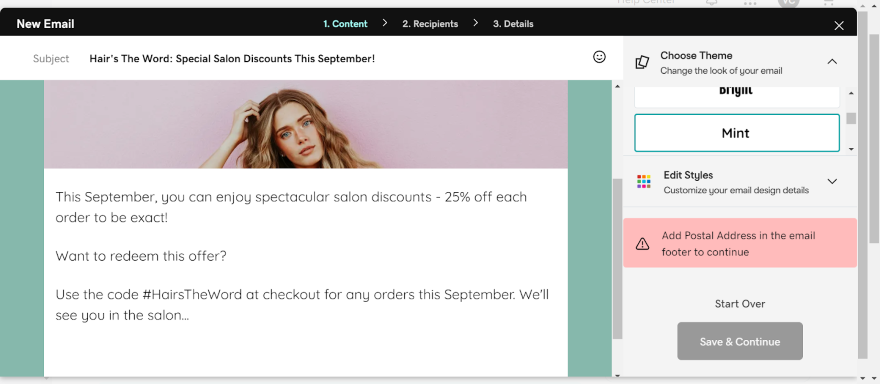
Before you finish, you need to add a postal address to the bottom of your email. Double click this area and enter your accurate address. Once that’s done, tap “Save & Continue” to proceed.
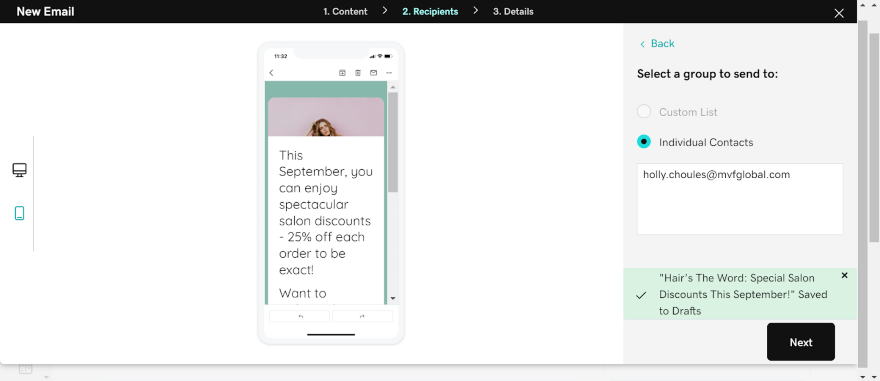
On the next page, you can preview your email to see if it’s mobile friendly, and decide who you’re going to send the email to. You can select recipients from a custom list, or add contacts individually. Click “Next” when that’s all good to go.
Last of all, there are a few important settings to finalize. Fill in your sender details, decide whether you want to enable click tracking (this tells you whether people are clicking on any of the links in your email), and schedule when you want your email to be sent out.
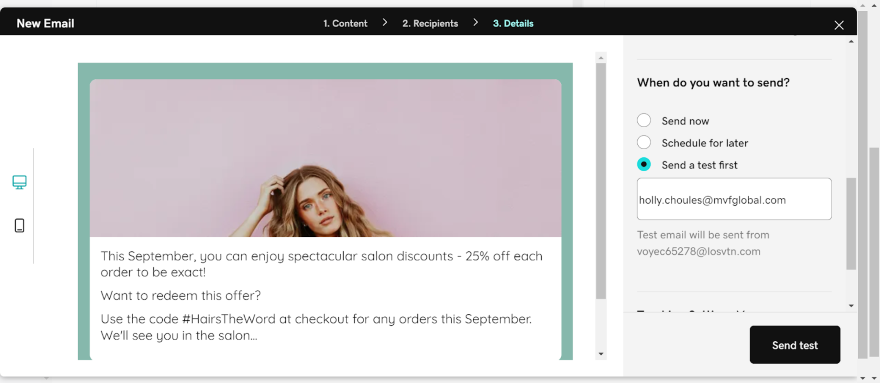
Everything sorted? If so, hit “send” to get your email on the go. Do note that you may have to verify your email address first, but once that’s sorted you’ll have successfully sent off your first email campaign – woosh!
6. Check Your Website Settings Before Hitting Publish
Congratulations, you’re almost there! But before you hit publish, examine these key website settings first.
From your website editor, click on the “Settings” tab. This gives you the chance to edit your site’s profile, covering key details such as your business name, official email address, physical address, and phone number.
To build trust with potential customers, you can also change your business category and ensure that it accurately represents what you’re offering.
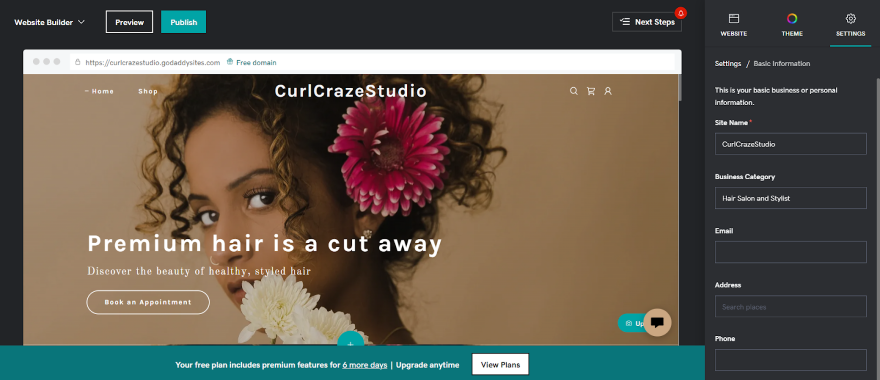
Now that your website settings are filled in, this is a great chance to double check your website before hitting publish. Click on the “Preview” button to see how your website looks on both desktop and mobile view. While you’re at it, you can also make sure that all of your photos are loading and that your links work.
Finally, your website is ready to go. You can now hit the mighty “publish” button and go live!
Building a Website on GoDaddy: Conclusion
After building a website on GoDaddy, I can conclude that it’s a brilliant choice for beginners. I found that the editor’s interface was easy to use, while there were a superb range of additional features to use. This included the built-in appointments and email marketing tools.
However, GoDaddy won’t be for everyone. If you want more powerful tools, sophisticated designs, or a better ecommerce function, read our list of the best website builders on the market. From Wix’s unparalleled website features to Squarespace’s sleek designs, you may find another option that’s better suited to your business’ needs.
But if you’re still committed to GoDaddy, enjoy building your website!
13 comments